
Student Administration Panel
Student Administration Panel
Teachers may now enroll students inside a course. Once enrolled, students may fully participate in the course in which the teacher enrolled them. PRISM makes this easy with it's proprietary Student Admin Panel.
In this tutorial you can learn how to...
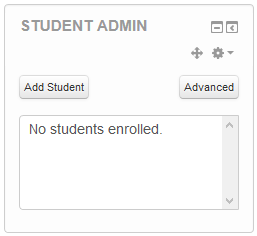
To get the Student Admin Panel in your course follow these instructions and look for "Student Admin" in the block list. After adding the block, you should turn editing off because of glitches that occur because of the drag and drop functionality. You should see the block in your course like the one shown below.
Block Navigation
Student Actions Panel
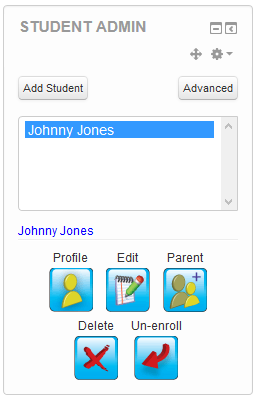 After a student has been entered, they will show up in the Student Admin list in alphabetical order by their last name. By clicking on name,the student actions panel will be loaded into the bottom of the block. Some of these buttons might not show up because of permissions or lack of student parents. These buttons can include...
- Profile
- Edit
- Add Parent
- Remove Parent
- Delete
- Un-enroll
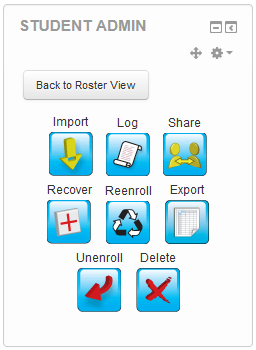
Advanced Actions Panel
Single Student Actions
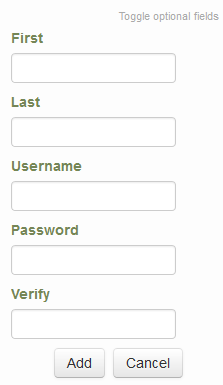
The Add Student button will allow you to add a single student into your course. After pressing the button "Add Student", you should see an entry form open up inside of the bottom of the block. There are some simple rules that must be followed when creating students this way.
- Usernames must be unique to the PRISM system. Using a username that already exists will not work.
- Passwords must be 6 characters in length.
- Note that email addresses are OPTIONAL. Do not enter fake email addresses.
Click the "Add" button to finalize you student. A red message will appear at the top of the block indication whether the student was successfully added or not. Clicking "Cancel" will clear and remove the form.
Edit Existing Students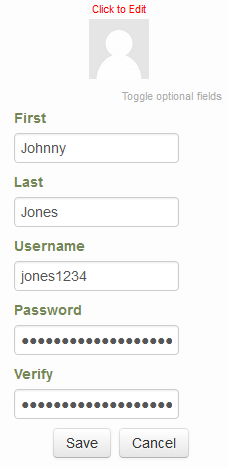
First you must load the intended student's action panel.![]()
Click the "Edit" button to bring up the edit student form. You should see everything exactly as you created it with three exceptions.
- Email if not entered will automatically be given the prism@rose-prism.org.
- The password field will "appear" to be very long. This is a security measure, your student's actual password is still there.
- At the top you will see the student's "avatar" image. You can click this image to display the Avatar upload system for students. (only teachers can do this).
First you must load the intended student's action panel.
Adding Parents
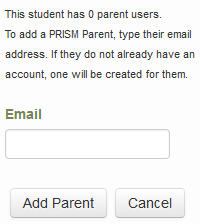
Click the "Parent +" button to bring up the add parent form. At the top of the form, you can see the parent count for that student. To add a parent, simply type their email address in the space provided and click "Add Parent". If a PRISM user with that email address already exists, they will be given parent rights for that child. If the user doesn't exist, they will be created and an email will be sent providing them with login instructions. Clicking "Cancel" will close the form.
Click the "Parent -" button to bring up the remove parent form. To remove a parent, simply click the Delete link beside the desired parent's email address. At the prompt, click "OK" to confirm or "Cancel" to stop.
Un-enroll or "Deactivate" Student
First you must load the intended student's action panel.
Un-enrolling a student using the Student Admin Panel is unlike un-enrolling them from your course in the traditional Moodle way because the Student Admin Panel will keep these students association to your course as "inactive" users. This means that you have the ability to re-use these students at a later time. Click the "Un-enroll" button to remove this student from your course. At the prompt, click "OK" to confirm or "Cancel" to stop.
Re-enroll or "Reactivate" Student
First you must load the advanced actions panel.
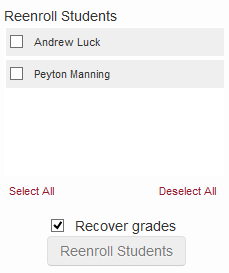
To "reactivate" a student who had previously been un-enrolled click the "Re-enroll" button. Then simply select the account you want to re-enroll, after which the "Re-enroll Student" button will be clickable. Click the button to re-enroll that student into your course.
First you must load the intended student's action panel.
Deleting a student's account is used when an account will never be used again. Using the delete function will tag this user's account for deletion. Moodle will clear the tagged users every 20 days. Until this user's account is cleared, it can still be saved using the "Recover" action. Click the "Delete" button to delete this student's account from Moodle. At the prompt, click "OK" to confirm or "Cancel" to stop.
Recover Deleted Students
First you must load the advanced actions panel.
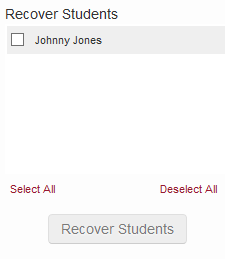
To recover a student account that has been deleted, click the recover button and the recovey" panel will appear at the bottom of the block. Simply select the account you will to recover, after which the "Recover Student" button will activate. Click the button to recover that student's account.
Import
First you must load the advanced actions panel.
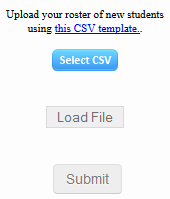
Importing is an advanced feature that allows teachers to quickly add a large list of students to their course. To get started with an import, you need to first download the .csv template file. This file will be used as a starting point to create your import file. Download this file by first clicking the "Import" button. The import form will be displayed at the bottom of the block. Click the this CSV template link to download the import template file. A .csv file can be opened and edited in any spreadsheet program. I we will use Microsoft Excel for this example. Open the downloaded .csv file in your spreadsheet program of choice.

Here are the rules that you must follow to have a successful student import.
- Usernames must be unique. This means that if you try to use jsmith, and that username is already taken, it will be automatically altered to jsmith1.
- Passwords must be 6 characters long. If the password you enter is less than 6 characters long, the password will automatically be altered by concatenating 1's to the end of it until it meets this requirement. ex ("pass" is converted to "pass11").
- Email address, Groups, and Groupings fields are optional. If you do put an email address in, it must be a valid email address. If you do not have an email address or have groups or groupings, leave the fields blank.
- If you understand how Groups and Groupings work and wish to use them, you can enter the name of the Group and/or Groupings. If the group or grouping does not exist it will be created.
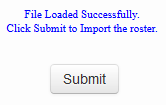
Once you have completed your import file, save it as a .csv and return to the import form where you downloaded the import template file. Click "Select CSV" and select your saved .csv import file and click "Ok". You will see that the "Load File" button will be enabled. Click "Load File". The system will check your file to make sure it is a valid file type. After this quick check you should see the File Loaded Successfully screen.
Click the "Submit" button to upload your import file and to begin the importing process. You might see a loading screen while your import is processing. Depending on the number of students in your import, this process could take a few minutes. After the import is complete you will be greeted with the post import screen. The Download Import Results link is very important. It will inform you as to if your usernames or passwords had needed to be altered. If you do not download it at this time, you can get it at a later date by using the Download Import Logs feature.
Share Students
First you must load the advanced actions panel.
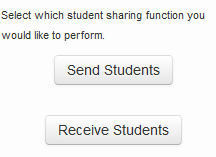
If you are very familiar with the student admin panel, you know that there was an Export feature in previous versions. This feature was not intuitive and has been reworked to be come the Share Students panel. Sharing students allows you to share your students with multiple courses. The students will then be allowed into both courses under one username. To share the students, click the "Share" button, then click the button that describes the process you want to accomplish.
Send Students
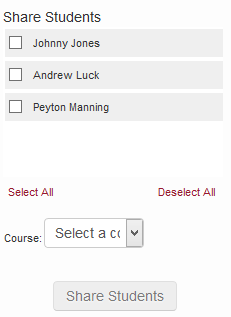
This screen is similar to the previous versions of the Share Students feature. You simple place a check mark beside the students that you want to share. The biggest change to the student sharing process is the smart drop box for course selection. This drop box will contain all courses from teachers that have the same school selected in their PRISM profile. If the course you are looking for belongs to another PRISM user, be sure that they have updated their PRISM profile to match your school. After a course is selected and at least 1 student is selected, the "Share Students" button will activate, allowing you to send a student share proposal to the course you selected. To finish the sharing process continue reading.
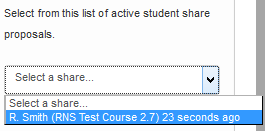
After selecting to receive a student share you will be met with the above screen. This contains all share proposals to your course. Simply select the share from the drop down menu.
After selecting a share, select the users that you want to transfer into your course and click the "Share Students" button to bring the select users into your course. After clicking the "Share Students" button, the selected share proposal will be deleted. If you forgot to select a student, the sharing process will need to begin over for that student.
First you must load the advanced actions panel.
Un-enrolling a student using the Student Admin Panel is unlike un-enrolling them from your course in the traditional Moodle way because the Student Admin Panel will keep these students association to your course as "inactive" users. This means that you have the ability to re-use these students at a later time. Click the "Un-enroll" button to remove all the students from your course. At the prompt, click "OK" to confirm or "Cancel" to stop.
Delete All Student Accounts
First you must load the advanced actions panel.
Deleting a student's account is used when an account will never be used again. Using the delete function will tag this user's account for deletion. Moodle will clear the tagged users every 20 days. Until these user accounts are cleared, they can still be saved using the "Recover" action. Click the "Delete" button to delete these student accounts from Moodle. At the prompt, click "OK" to confirm or "Cancel" to stop.
If you have a question about these features please send us an email.